What it is
A screenshot often explains a problem faster than words. You can attach files when you create a support request and with any reply.
Where to find it
Support > New request > Attach files. In an open request, Attach files sits under the reply box.
Steps
- Write your new request or reply.
- Press Attach files and choose one or more files.
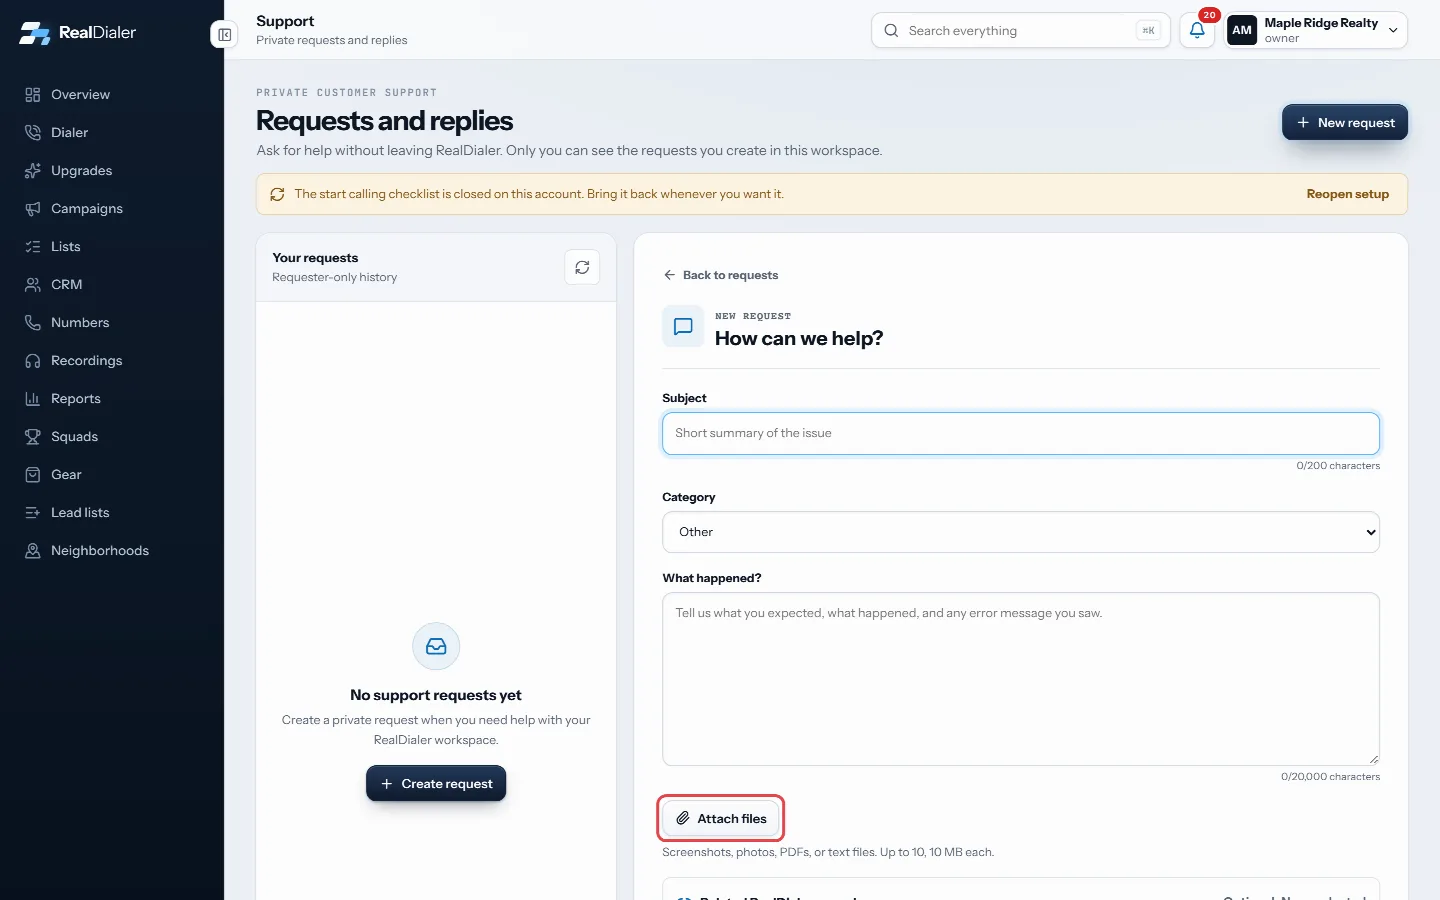
Press Attach files and choose one or more files - Check the list of files to send. Press the X next to a file to remove it.
- Press Create request or Send reply.
Good to know
- You can attach photos and screenshots (JPG, PNG, GIF, WEBP, HEIC), PDFs, and text, log or CSV files.
- Up to 10 files per message, each up to 10 MB.
- If a file cannot be attached, your message is still sent and the screen says which file was left out. Files that failed to upload stay selected so you can send them with a short reply.
- Support can see attachments only on the request you add them to.
- Files sent by email to support@realdialer.com are kept on the ticket too when they are photos, PDFs or text.
- Never attach anything with card numbers or passwords.
Was this guide helpful?
Thanks. It helps us make these better.
Next in Support
Create a support requestThe Support page is where you ask RealDialer for help without leaving the app. Each request becomes a private ticket that only you and RealDialer support staff Email RealDialer supportYou can write to support@realdialer.com at any time. An email from the address on your RealDialer login becomes a support request on your account, and it shows Reply to or reopen a support requestEvery request you make is listed on the Support page with its status and reference number. You can read support's replies, answer them, and reopen a resolved re
Still stuck? Write to support@realdialer.com, or open Support from inside RealDialer.